Have you ever heard of Dockerception?
Well, hold onto your hat. We’re going down the rabbit hole.
Portainer, the web UI you’re about to install on top of Docker, is itself a Docker container.
It’s a tool that runs on the very thing it manages. You spin it up with one docker run line, and the first thing it does is reach back through a small hole in the host (a socket file) and ask the Docker daemon to show it every container on the box — including itself. From inside that browser tab, you manage all of your other Docker containers.
The UI you’re staring at shows up in its own container list.
On a VPS where you’re already paying for the box and already comfortable with SSH, Portainer slots in cleanly on top of Docker without changing how anything underneath works.
That’s the value.
A 4 GB box can be a starting point for Docker and Portainer, but the applications you add determine whether that capacity is enough. Think home automation, the family photo store, the AI assistant, and the newsletter you’ve been threatening to launch — on one server you actually own.
Here’s how to get it running, lock it down, and start seeing value.
What Is Portainer, Exactly?
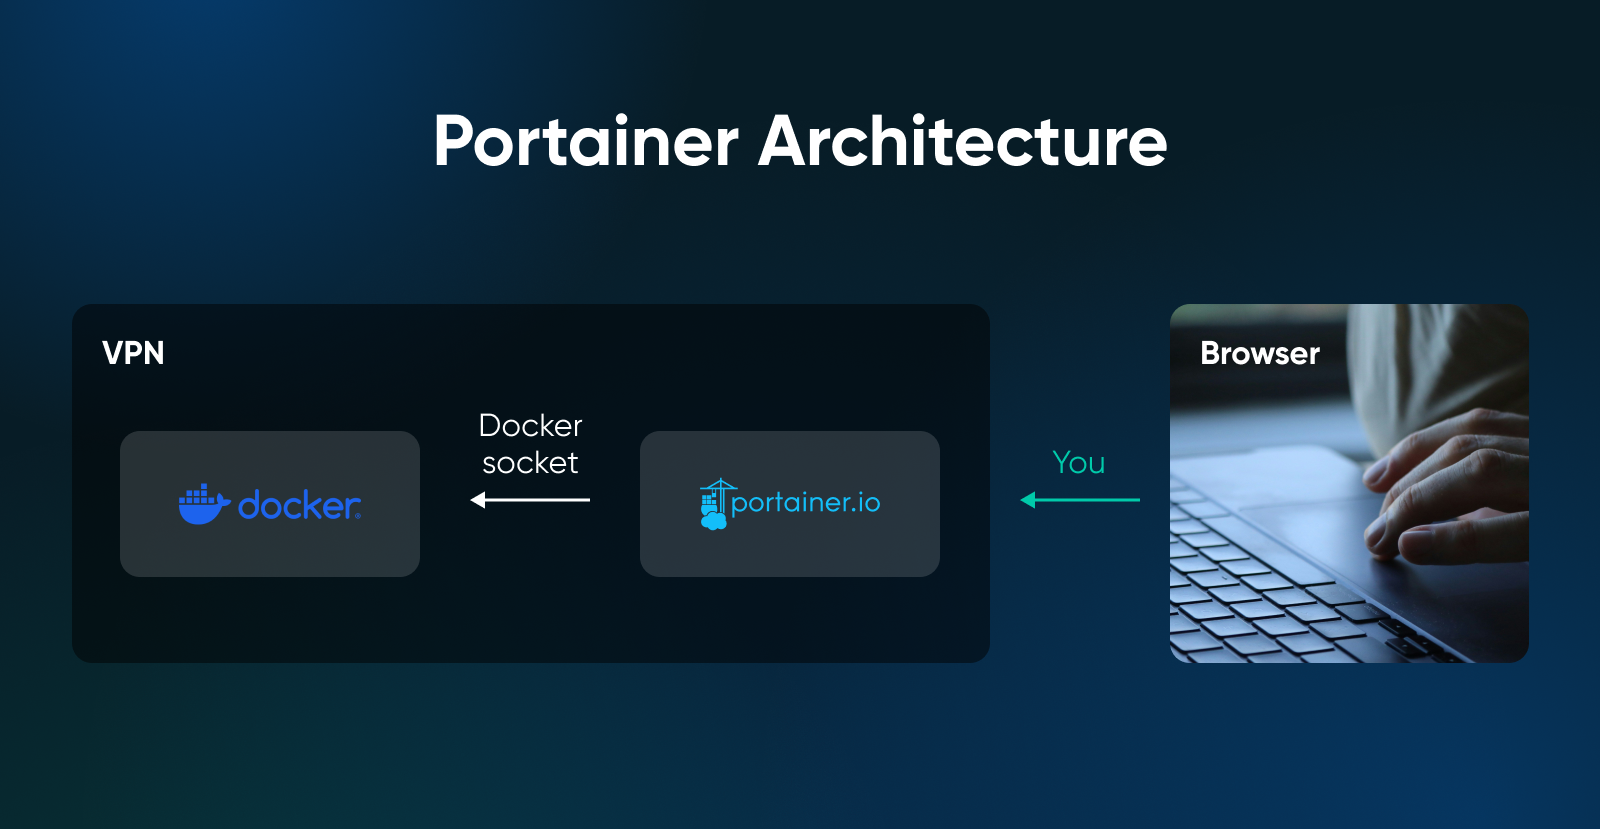
Portainer is a web UI that runs as a Docker container and manages your other containers through the Docker socket.
It’s essentially a browser-based front end (a Docker GUI) for the same Docker commands you’d otherwise type by hand, plus stack management, role-based access (if you upgrade to Business Edition), and a dashboard view of CPU and memory.
The socket connection is what makes it work. The bind looks like -v /var/run/docker.sock:/var/run/docker.sock in the install command, and that one line is doing all the heavy lifting. Without it, Portainer is a UI for an empty Docker host. With it, Portainer is the Docker host’s remote control.
One thing to keep in mind: any process that can reach /var/run/docker.sock can control the Docker daemon, and Docker’s own security docs are blunt that only trusted users should be allowed to do that: a container started through the daemon can mount the host’s entire filesystem and alter it without restriction. That’s a feature when it’s Portainer doing the asking and a problem when it’s some container you spun up last week and forgot you’d given socket access to.
Treat the socket bind as a privileged capability, and audit every other container that wants one.
Do You Need Portainer If You Already Have Docker?
Nope. Docker works fine from the terminal, and plenty of people run a couple of containers for years without ever installing a UI on top.
You want Portainer if:
- You’ll juggle more than two or three Docker containers across different apps.
- You’d rather click “restart” than retype a Compose command at 11 pm.
- You’re sharing access with someone who doesn’t live in a terminal.
- You want to deploy stack updates from a Git repo without writing a deploy script.
Skip Portainer if:
- You’re running one or two containers that rarely change.
- You’re already comfortable with Docker Compose, and you’re happy to stay there.
Docker itself is mainstream enough that this isn’t a fringe decision. In the 2025 Stack Overflow Developer Survey, 71% of respondents reported using Docker — the top result among cloud development and infrastructure technologies, after a 17-percentage-point jump from 2024. The Portainer project has more than 38,000 stars on GitHub as of August 2026.
Other options exist. Dokploy, for example, leans further toward a full self-hosted PaaS, handling apps, databases, and SSL for you. Portainer stays closer to plain Docker: same Compose files, same images, just with a UI on top.
If you live in tmux and run one app, close this tab. You’re fine. If you’re running four self-hosted apps and you’ve googled, “What are Docker logs again?” twice this month, keep reading.
How Big a VPS Do You Need To Run Docker and Portainer?
Portainer publishes no RAM minimum. A 4 GB VPS may suit a small stack, but size it from the combined requirements of the operating system, Docker daemon, and every container you plan to run.
Portainer’s own requirements page says surprisingly little about RAM: the Server ships as a lightweight container, and the stated performance guidance in the docs concerns storage (more on that below). The real RAM math is your workloads — budget for the operating system, the Docker daemon, and every container you plan to run. Budget disk for logs, too: Docker’s default json-file log driver performs no log rotation, so a chatty container’s logs can eat a significant amount of disk over time. Docker’s logging docs recommend the local driver instead. Once Docker is installed (step 2 below), create Docker’s configuration directory and set the local logging driver, then restart Docker: run sudo install -d -m 0755 /etc/docker, then printf '%s\n' '{ "log-driver": "local" }' | sudo tee /etc/docker/daemon.json > /dev/null, then sudo systemctl restart docker. Do it before you deploy long-running apps: the local driver rotates logs by default, and the change only applies to containers created after it.
Here’s how that maps to real workloads:
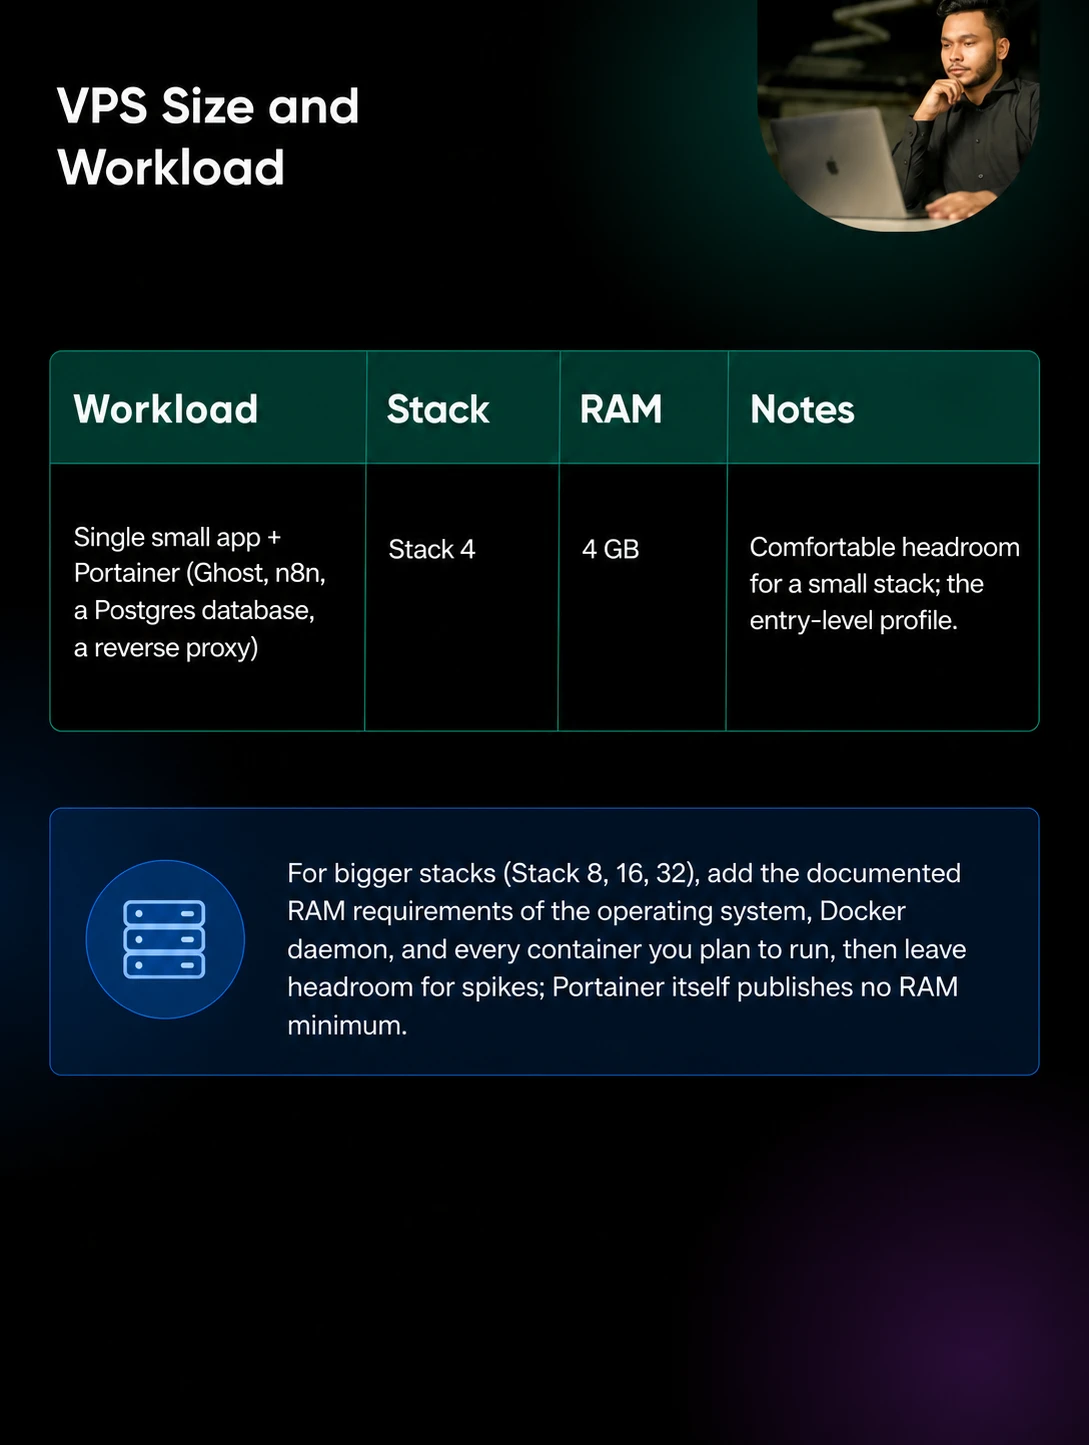
The worksheet is simple addition: look up the documented RAM requirement for each app you plan to run, add the operating system and the Docker daemon, then leave headroom for usage spikes. Portainer itself does not publish a RAM minimum, so it’s the apps — not the UI — that fill the box.
At DreamHost, our VPS Hosting comes in four RAM-based Stack plans (Stack 4, 8, 16, and 32). The entry-level Stack 4 (2 vCPUs, 4 GB RAM, 75 GB of NVMe SSD, full root access) is a natural fit for a small Docker host. On monthly billing it’s $8.99/mo for the first 3 months and auto-renews at $15.99/mo after that (as of August 2026; the full term plus taxes is charged at checkout — current numbers are always on the Docker + Portainer VPS page).
If you’re on the fence about whether self-hosting is worth the time, Stack 4 is the size to start with: big enough to find out, small enough that you’re not paying for headroom you won’t use. If your worksheet outgrows it, you can move up a plan and your environment moves with you — but note that scaling back down to a smaller Stack isn’t currently supported, so start small on purpose.
One note on storage: Portainer’s data volume holds its own database and configuration, plus a clone of any Git repository you deploy stacks from — Portainer’s docs warn that large or multiple repos can consume significant disk. The docs’ stated performance guidance is about storage, not memory: SSD-level performance (≈3.5 MB/s, 30,000 IOPS or above, under 10ms write latency) is what they call ideal. Stack 4 includes 75 GB of NVMe SSD storage.
How Do You Install Docker and Portainer on a VPS?
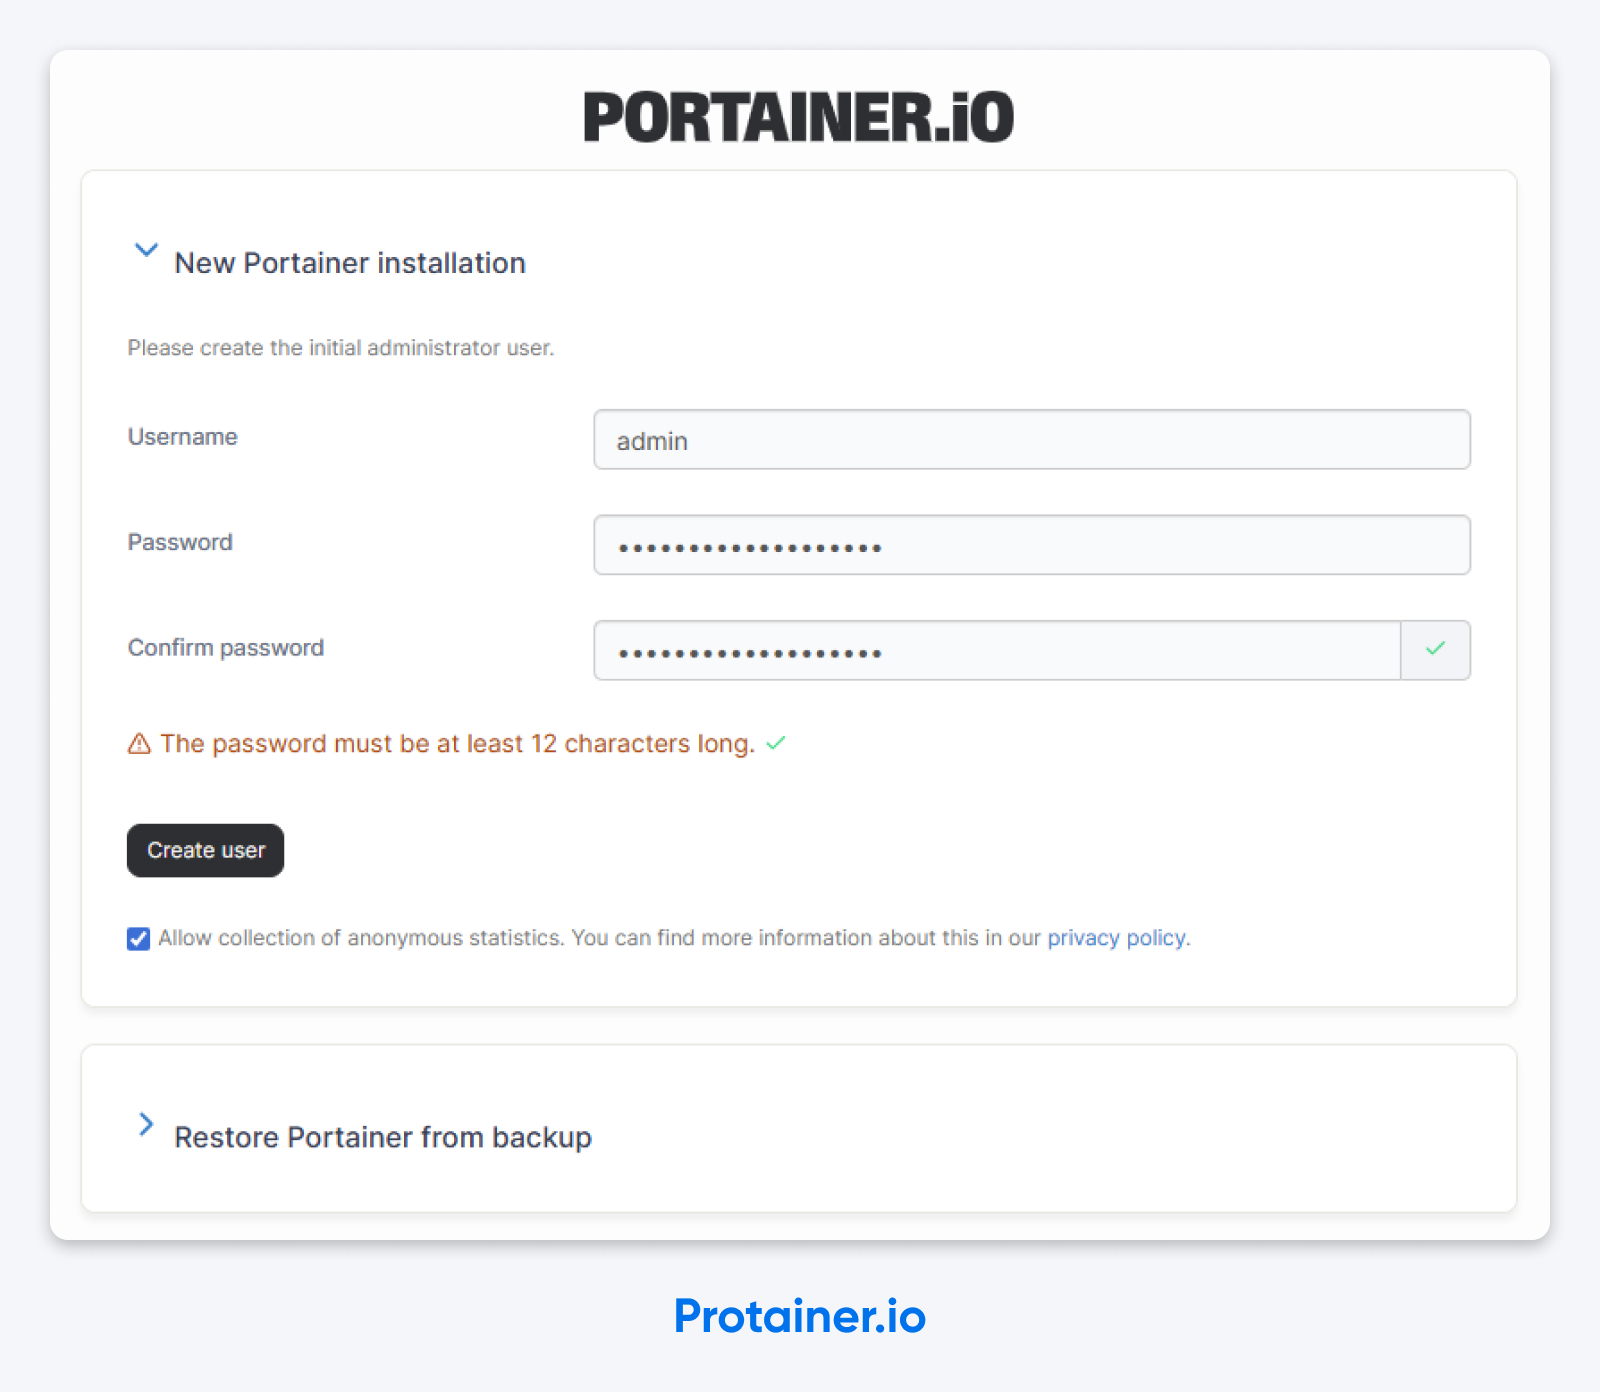
It takes seven steps. Download and installation time depends on your VPS and network connection. The commands in steps 2 through 6 are written for Ubuntu and can be pasted in order on a clean server; the one place a command needs a value only you know (your own IP address, in step 4) is called out in the step. (Want to skip the whole list? DreamHost VPS Hosting’s app library includes a Docker + Portainer image with both preconfigured.)
1. Pick a Linux distribution
This guide uses Ubuntu 24.04 LTS. Docker Engine supports Ubuntu 22.04, 24.04, and 26.04 LTS (as of August 2026). Ubuntu is one of the pre-installed OS options on DreamHost VPS Hosting.
Debian and RHEL-family distributions like AlmaLinux work too, but they have their own install paths in Docker’s docs, and the commands below won’t transfer as-is. One extra wrinkle on the RHEL family: Portainer’s install doc assumes SELinux is disabled, and says to pass --privileged to Docker when deploying Portainer if you need SELinux on. If that sentence didn’t mean anything to you, use Ubuntu.
Not sure what version of Ubuntu you’re running? Learn five ways to check.
2. Install Docker from the official repository
Don’t apt install docker.io, and don’t install Docker via snap either — Docker’s official install docs list docker.io among the unofficial packages to uninstall before installing Docker Engine, and Portainer’s install doc warns the snap package can cause compatibility issues.
First, clear out any conflicting packages. This is the removal command from Docker’s current install doc, and on a clean server it usually finds nothing to remove — the doc notes that apt might report you have none of these packages installed:
sudo apt remove $(dpkg --get-selections docker.io docker-compose docker-compose-v2 docker-doc docker-buildx podman-docker containerd runc | cut -f1)Next, add Docker’s GPG key (each line below is its own command):
sudo apt update
sudo apt install ca-certificates curl
sudo install -m 0755 -d /etc/apt/keyrings
sudo curl -fsSL https://download.docker.com/linux/ubuntu/gpg -o /etc/apt/keyrings/docker.asc
sudo chmod a+r /etc/apt/keyrings/docker.asc
Then add Docker’s apt repository. This writes the repository definition to /etc/apt/sources.list.d/docker.sources — the file Docker’s install doc uses — with your Ubuntu version and CPU architecture filled in automatically:
sudo tee /etc/apt/sources.list.d/docker.sources > /dev/null <<EOF
Types: deb
URIs: https://download.docker.com/linux/ubuntu
Suites: $(. /etc/os-release && echo "$VERSION_CODENAME")
Components: stable
Architectures: $(dpkg --print-architecture)
Signed-By: /etc/apt/keyrings/docker.asc
EOF
sudo apt update
Finally, install Docker Engine and the Compose plugin in one go:
sudo apt install docker-ce docker-ce-cli containerd.io docker-buildx-plugin docker-compose-plugin3. Verify Docker is running
Run sudo docker run hello-world.
If you don’t get the “Hello from Docker!” message, fix the daemon before layering Portainer on top.
4. Wire UFW into Docker before you start Portainer
Here’s the part most guides put at the end, where it’s too late: when Docker publishes a port, traffic to it is diverted before it reaches the chains UFW filters, so a published port is reachable from the public internet even when UFW says it’s denied. (The full explanation is below.) The moment you start Portainer, its port 9443 will be public — during the very five-minute window when anyone who reaches it first gets to create the admin account. So fix the firewall first.
If UFW isn’t already active, allow SSH and enable it. (If your SSH runs on a custom port, allow that port instead of 22, or this is the step where you lock yourself out.)
sudo ufw allow 22/tcp
sudo ufw enable
Then install chaifeng/ufw-docker, a third-party tool that appends the needed rules to /etc/ufw/after.rules so traffic to Docker’s published ports is filtered through the DOCKER-USER chain. The commands below pin the project’s 251123 release (November 2025) rather than pulling from the moving master branch, and they use curl, which you installed back in step 2:
sudo curl -fsSL -o /usr/local/bin/ufw-docker \
  https://github.com/chaifeng/ufw-docker/raw/251123/ufw-docker
sudo chmod +x /usr/local/bin/ufw-docker
sudo ufw-docker install
sudo ufw reload
After the reload, published container ports are filtered through UFW. If your routed-traffic policy denies incoming connections and no existing rule allows the port, public connections remain blocked until you allow them explicitly. (The ufw-docker project notes that if the rules don’t take effect after a UFW restart, a server reboot fixes it.)
Now pre-approve your own access to the Portainer UI. Replace YOUR_HOME_IP with the public IP you’ll be browsing from:
sudo ufw route allow proto tcp from YOUR_HOME_IP to any port 9443With this rule in place before Portainer starts, IPv4 traffic to the UI is allowed from your IP and nobody else’s — including during the initial-admin window. The rule as written covers IPv4 only. ufw-docker’s docs say the tool also supports IPv6 networks and updates /etc/ufw/after6.rules when necessary, but don’t take that on faith: if your VPS answers on a public IPv6 address, run the outside-in test from the firewall section over IPv6 too before you trust it. The trade-off: most home connections change IP occasionally, so you may need to update the rule later. If that annoys you, the cleaner long-term answer is a VPN in front of the UI (covered in the lock-down section).
5. Create a persistent volume for Portainer’s data
Next, run sudo docker volume create portainer_data.
Keeping Portainer’s database on a Docker volume (not inside the container) means a Portainer upgrade won’t wipe your config.
6. Run Portainer Community Edition
This is the command from Portainer’s Linux install doc, minus one flag: the official version also publishes port 8000, a TCP tunnel that’s only required if you later connect remote environments via Edge Agents. A single-host install doesn’t need it, so we leave it out:
sudo docker run -d \
  -p 9443:9443 \
  --name portainer \
  --restart=always \
  -v /var/run/docker.sock:/var/run/docker.sock \
  -v portainer_data:/data \
  portainer/portainer-ce:lts
Let’s break that down line by line:
-druns it detached.-p 9443:9443is the Portainer web UI on HTTPS — the port you allowed for your IP in step 4.--restart=alwaysbrings Portainer back up after a reboot.-vflags are the socket bind and the persistent volume from step 5.:ltspins you to Portainer’s Long Term Support release line — the tag Portainer’s own install doc uses.
7. Open the UI and create your admin account
Point your browser to https://YOUR_VPS_IP:9443 (from the IP address you allowed in step 4).
Click through the self-signed cert warning. You’ll land on the “create the initial administrator user” screen. Pick a username that isn’t admin, set a strong password, and save it somewhere real. And… you’re in!
Why Did Portainer Just Time Out on Me?
Because Portainer waits exactly five minutes for someone to claim it on first install. If nobody does, it locks the door.
Verbatim from Portainer’s own FAQ:
“As a security precaution, when Portainer is first installed it will wait for 5 minutes for an administrator user to be created (part of the initial setup). If a user is not created within those 5 minutes, the Portainer Server will stop listening for requests.“
Translation: if you spent Step 6 making a sandwich, your install is now refusing to talk to you — and you didn’t do anything wrong.
The fix is simple. Run sudo docker restart portainer.
That spins the container back up, gives you another five-minute window, and drops you on the create-admin screen. Repeat as needed. Welcome to self-hosting.
If you’re scripting the install for a fleet (Ansible, Terraform, a deploy pipeline), Portainer accepts an --admin-password-file flag that creates the admin user from a file when the container first starts — so there’s no create-admin screen to race to. Portainer’s CLI configuration doc covers the syntax. For a one-off VPS install, the restart trick is fine.
How Do You Stop Docker From Bypassing Your Firewall?
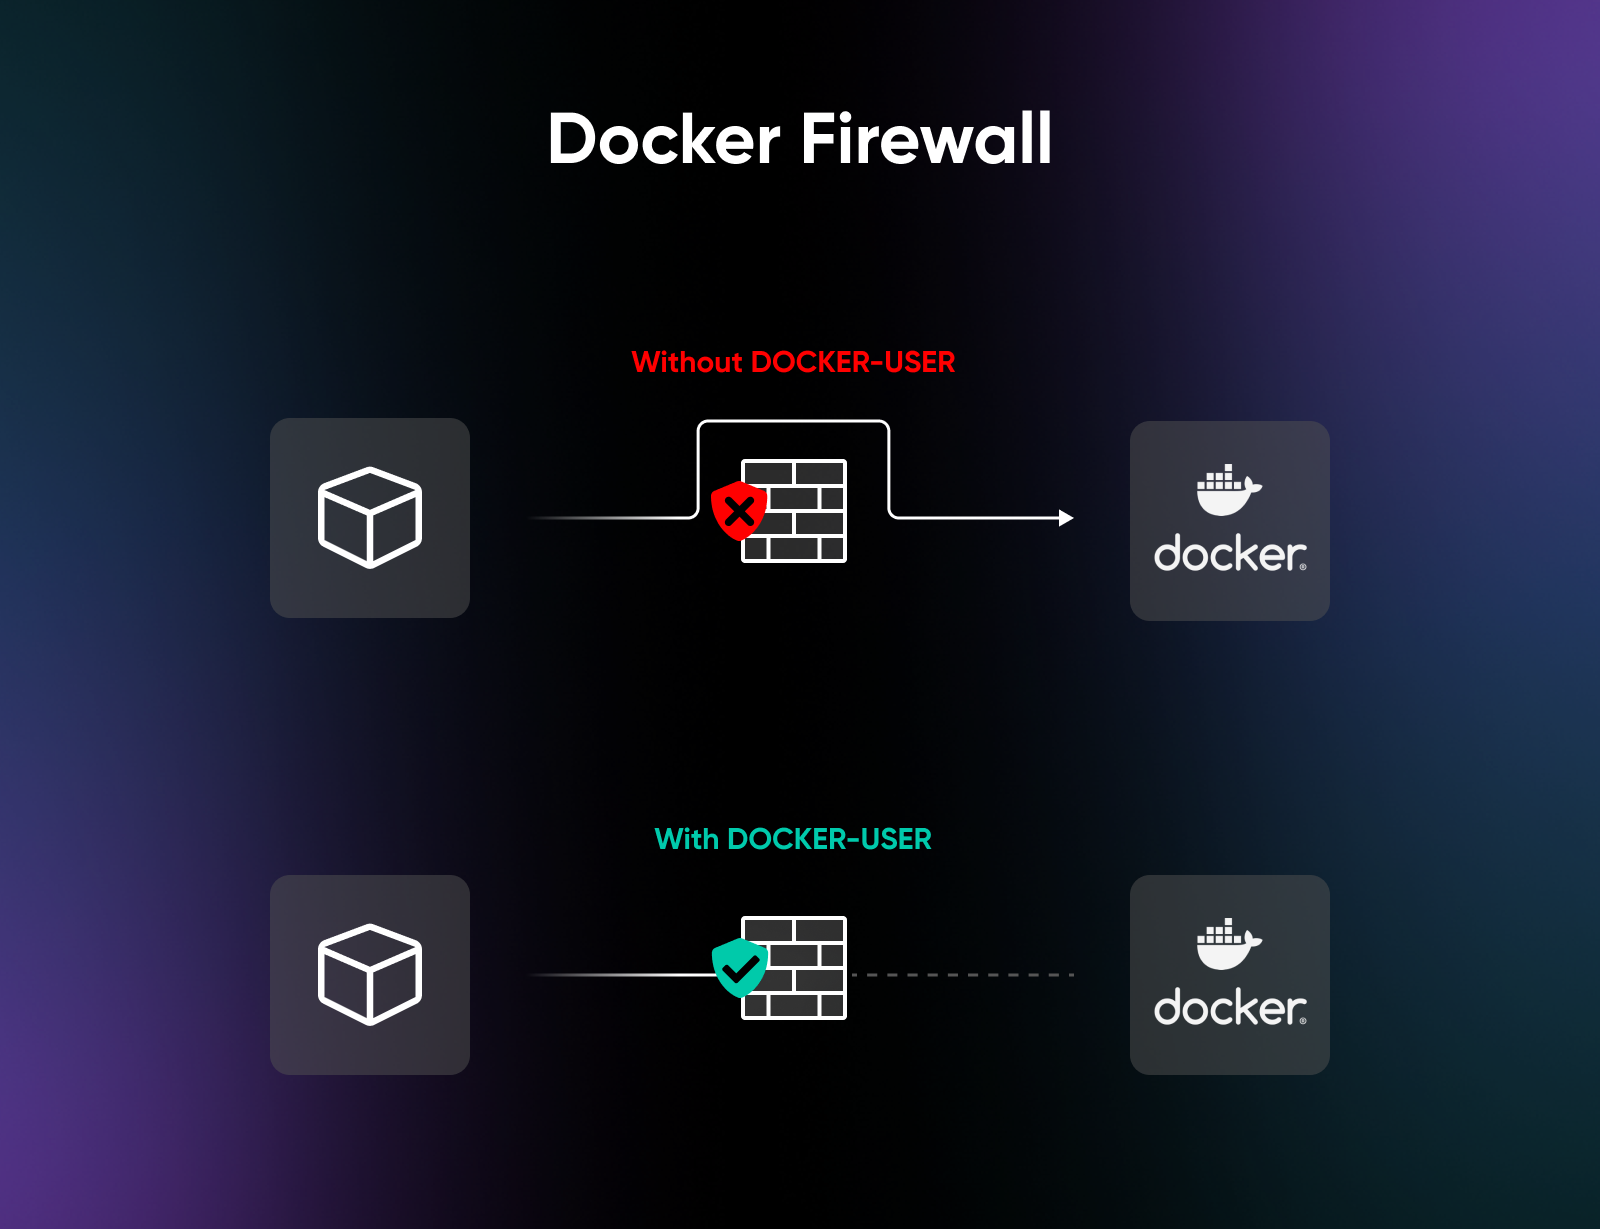
You already did, in step 4. Here’s what actually happened, how to open ports on purpose, and how to prove it worked.
The problem: when you publish a container’s port with -p 80:80, that port is reachable from the public internet even if ufw status shows port 80 as denied. Per Docker’s packet-filtering documentation, “Docker routes container traffic in the nat table, which means that packets are diverted before it reaches the INPUT and OUTPUT chains that ufw uses.”
UFW isn’t broken. It’s just standing in the wrong hallway.
The fix Docker itself points to is the DOCKER-USER iptables chain — a chain Docker creates specifically for user-defined rules, processed before the rules in Docker’s own chains. The ufw-docker script you installed in step 4 wires UFW into that chain by appending a rule block (between # BEGIN UFW AND DOCKER and # END UFW AND DOCKER markers) to /etc/ufw/after.rules, so it loads with the rest of your UFW configuration.
To open a container port to the public on purpose — say, a web app on container port 80 — use a route rule:
sudo ufw route allow proto tcp from any to any port 80One trap the ufw-docker docs call out: the rule takes the container port, not the host port. If you published with -p 8080:80, the rule above (port 80) is the right one, not port 8080.
To verify from the outside, test from a network that isn’t on your allow list — a phone hotspot works. This should time out rather than return Portainer’s login page:
curl -k --max-time 5 https://YOUR_VPS_IP:9443

# For IPv6, enclose the address in square brackets:
curl -k --max-time 5 'https://[YOUR_VPS_IPV6]:9443'
Run the same command from the IP you allowed in step 4 and you should get HTML back. UFW saying “denied” is a claim; a timeout from a strange network is evidence.
To undo it all, run sudo ufw-docker uninstall, which the project documents as restoring your UFW configuration and deleting the files it installed, then sudo ufw reload. You can also remove the block between the # BEGIN UFW AND DOCKER and # END UFW AND DOCKER markers in /etc/ufw/after.rules by hand and reload UFW.
This one catches sharp engineers on personal boxes and production servers alike: UFW says one thing, the public internet says another, and the truth is in iptables. If you’d rather Portainer never had a public port at all, front it with a VPN tunnel like WireGuard.
What Should You Lock Down Right After the First Login?
You’re in. Five things worth doing before you close that browser tab — the first four come straight from Portainer’s own security guide:
- Turn on Force HTTPS only. The install in this guide publishes only port 9443, so no HTTP port is exposed in the first place. Flipping the Force HTTPS only toggle under Settings → SSL Certificate locks that in: per Portainer’s settings docs, it disables listening on the legacy HTTP port (9000) entirely, so a future redeploy that adds
-p 9000:9000can’t reopen an unencrypted path. - Replace the self-signed certificate. Upload a cert you generated, or front Portainer with an NGINX reverse proxy holding a Let’s Encrypt certificate. Past day one, clicking through the browser warning every time is a habit you’ll regret.
- Use a real admin username. Using the default admin username gives an attacker one less credential to determine. Pick something specific to you.
- Restrict the UI to a VPN. Running Portainer behind a WireGuard VPN is the pattern Portainer’s security guide points to. A 9443 restricted to your source IP (step 4) is good. A 9443 that’s only reachable on a private network is better.
- Audit the Docker socket bind. Anything with access to
/var/run/docker.sockcontrols the Docker daemon, and through it, the host. Do not mount the socket casually into other containers. Every additional bind is a new path to the host. If a container claims it needs the socket, ask why — and consider a socket proxy if the answer is “for monitoring.”
How Do You Actually Use Portainer Day-to-Day?
The payoff for installing Portainer is the day you stop SSH’ing in to restart a misbehaving container, and start clicking a button instead. The bigger payoff is stack management.
A Portainer stack is a multi-container app defined by a Docker Compose file. Portainer can deploy supported Docker Compose configurations as stacks through four routes listed in the official stacks docs:
- Paste Compose into the web editor
- Upload a Compose file
- Point Portainer at a Git repository
- Deploy from a custom template
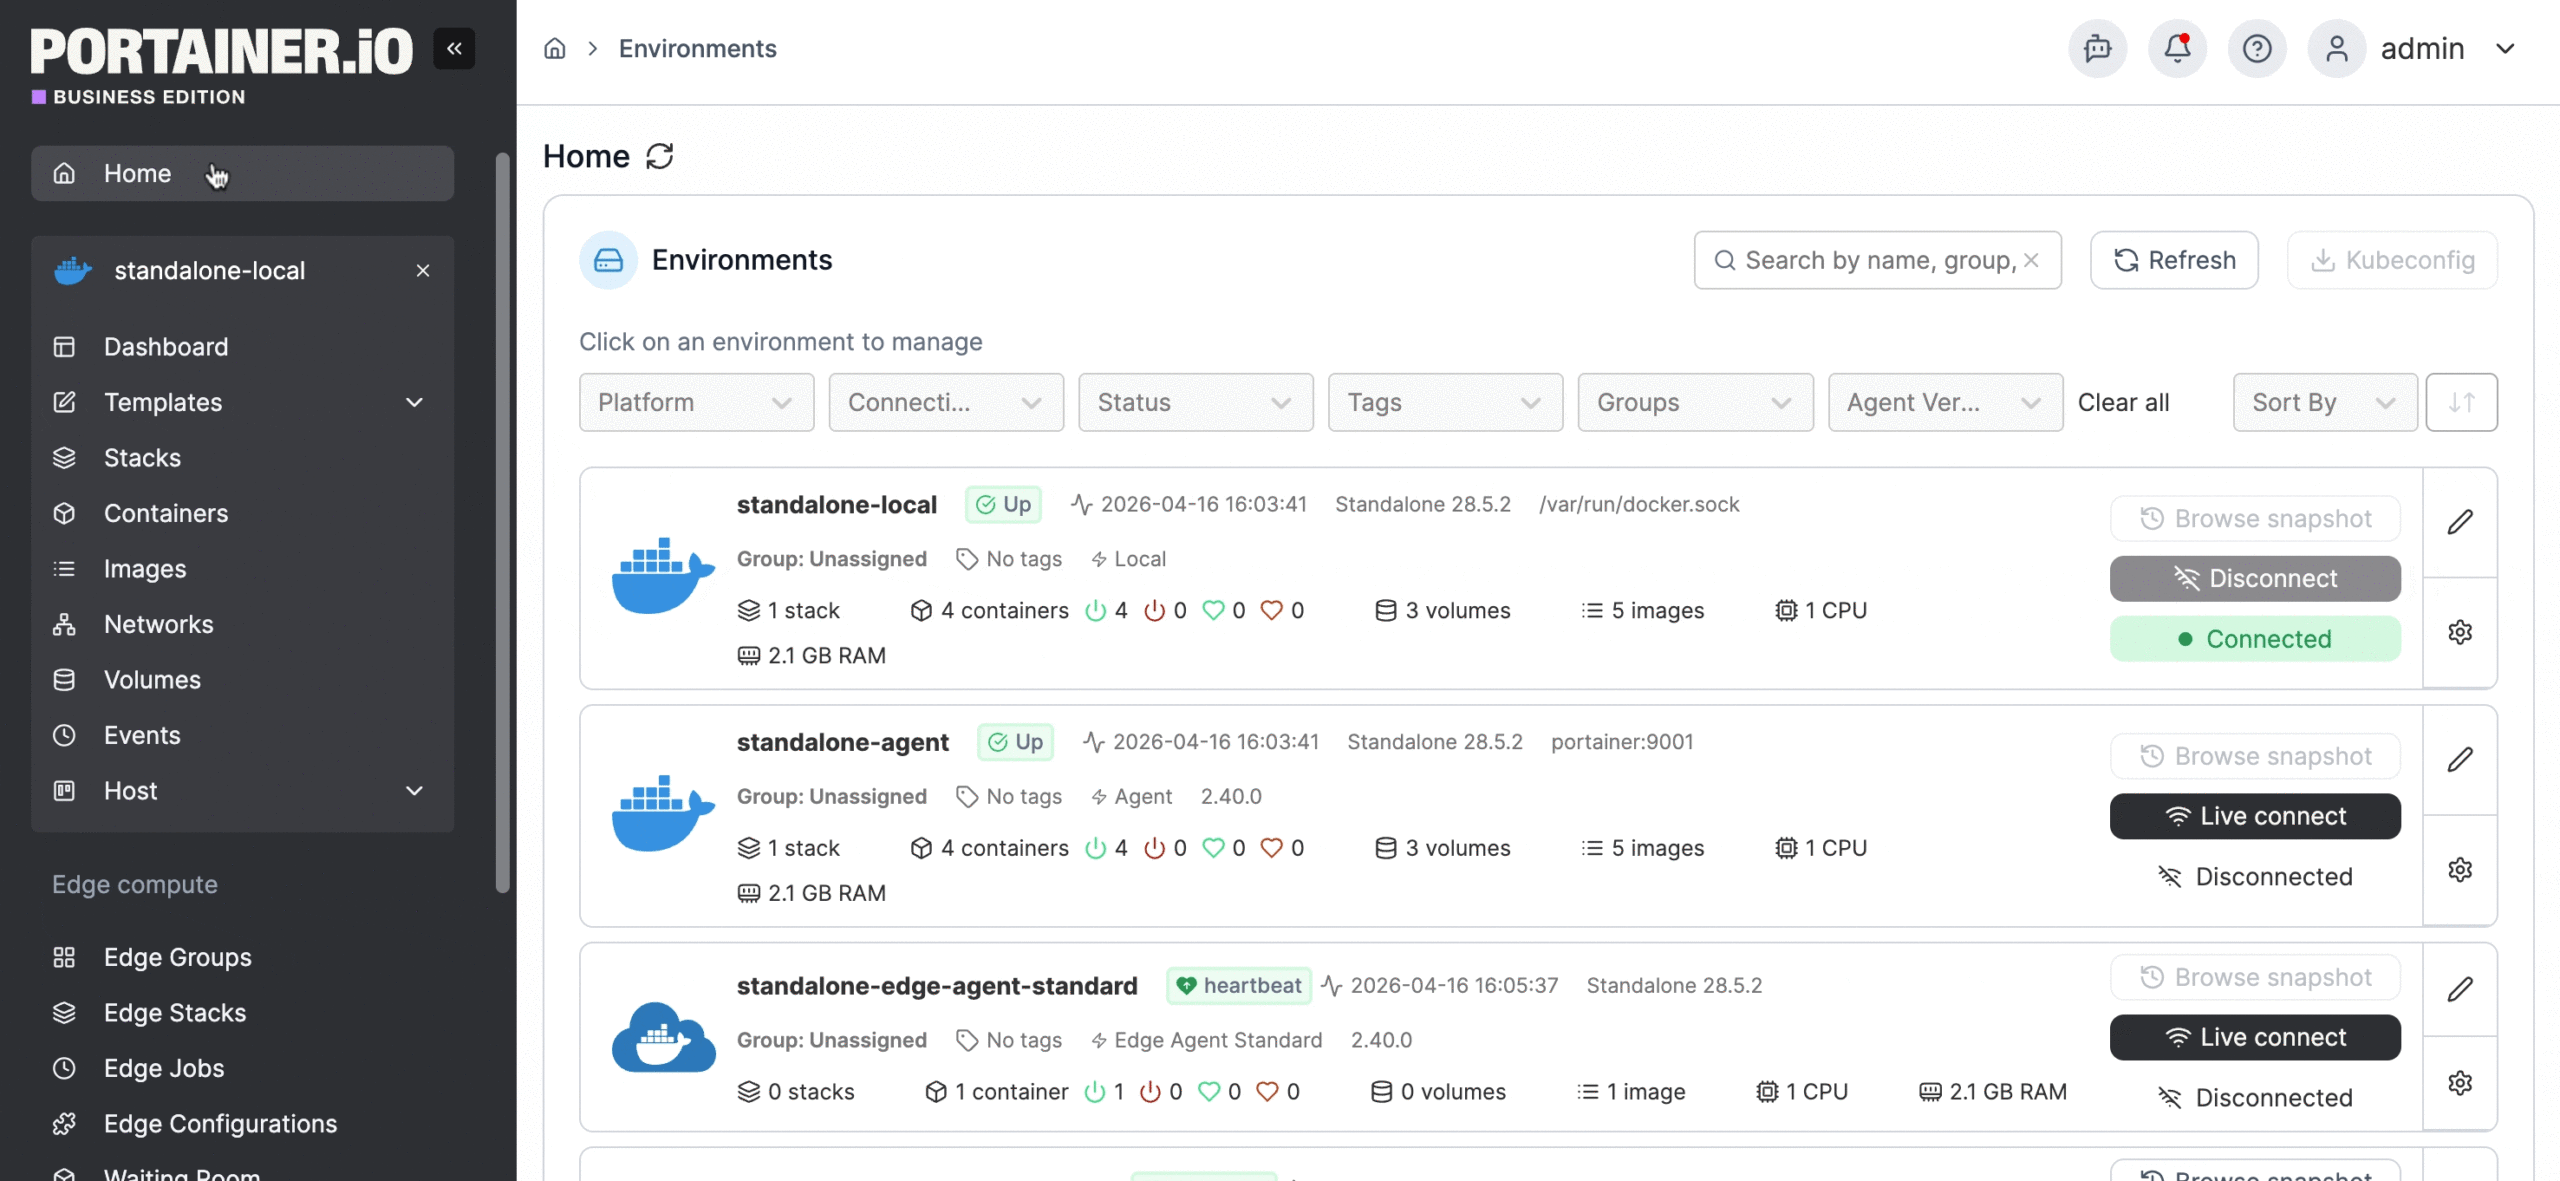
The Git path is the one that matters. You point Portainer at a public or authenticated repo and a path to docker-compose.yml, then toggle on GitOps updates. Portainer either polls the repo on a fetch interval you set, or gives you a webhook URL to add to your Git host (triggered from a GitHub Action, for example). When the Compose file changes upstream, Portainer pulls and redeploys automatically. And yes, this works in Community Edition — on the stacks docs page, only the relative-path volumes option carries the Business Edition flag.
That’s the self-hosted version of “deploy on push” without paying a PaaS for the privilege.
The smaller daily wins add up too. Think logs in a panel instead of following them from the command line, one-click restarts, rebuilding a stack from a button, and resource graphs you can scan in three seconds instead of running Docker stats.
If you later add remote hosts through Edge Agents, port 8000 comes back into play — the FAQ below covers the redeploy and the firewall rule.
How Do You Back Up Portainer and Your Containers?
A volume is persistence, not a backup. The portainer_data volume from step 5 survives container upgrades, but it lives on the same disk as everything else — so a real backup plan has three parts, and all three leave the VPS.
1. Portainer’s own configuration. In the UI, go to Settings → Back up Portainer, keep the default Download backup file option, and click Download backup. Per Portainer’s settings docs, that downloads a tar.gz of everything Portainer stores on its /data volume, optionally password-encrypted, and that archive is all you need to restore Portainer. The docs are equally clear about scope: it backs up only the Portainer configuration, not the containers, stacks, or volumes you’ve deployed. (Scheduled backups to S3 exist, but only in Business Edition — in CE, put a recurring reminder on your calendar.)
2. Your application data. Docker’s volumes documentation calls named volumes the preferred way to persist container data, and easier to back up or migrate than bind mounts. A read-only mount only stops the backup container from writing — the app itself can still write to the volume mid-archive and hand you an inconsistent copy. So stop the app’s container first (sudo docker stop myapp), or use the app’s own supported backup mechanism. Then mount the volume read-only into a throwaway container and tar it up, and start the app again after (swap in your own names):
sudo docker run --rm \
  -v myapp_data:/source:ro \
  -v "$PWD":/backup \
  alpine tar czf /backup/myapp_data.tgz -C /source .
For databases, prefer the database’s own dump tool (pg_dump, mysqldump) over copying live data files, so you’re not archiving a file mid-write. Then ship the archives off the box on a schedule — rsync or scp to another machine, or push to object storage. A backup that lives on the disk it’s backing up disappears with that disk.
3. Your Compose files and secrets. If you deploy stacks from Git, the Compose files are already off-host. What Git does not hold is anything you never committed: .env files, API keys, and passwords you supplied at deploy time. Bind-mounted directories also sit outside the volume backup above. Inventory those separately and back them up encrypted.
Then test the restore, before you need it. Portainer’s docs say a configuration restore only works on a fresh instance: deploy a new Portainer container with an empty data volume (a throwaway VPS or your laptop is fine), choose Restore Portainer from backup during the initial setup, and confirm you can log in with your old credentials and see your stack definitions. That drill covers part 1 only — Portainer’s configuration. Parts 2 and 3 need their own test, per app: restore an archive into a fresh volume, start the app against it, and check the data is actually there. An untested backup is a hope with a filename.
What Does Portainer Cost? (And When Does Free Stop Being Free?)
Portainer is free twice over. Community Edition is free and open source (zlib license), with no license key required. And Portainer Business Edition is free forever for up to 3 nodes: full Business features, no time limit, no credit card. You register for a free license key instead of paying.
| Edition | Cost | Nodes | Best for |
|---|---|---|---|
| Community Edition | Free, open-source | No node licensing | Personal projects, homelab, single-VPS self-hosters |
| Business Edition — 3 Nodes Free | Free, no time limit | Up to 3 | Small homelabs that want Business features like RBAC |
| Home & Student | $155/yr | Up to 15 | Bigger homelabs and students; strictly non-commercial |
| Business Starter | From $105/mo | 5, 10, or 15 | Small teams managing real infrastructure (community support) |
| Business Scale | From $209/mo | 5 to 35 | Growing teams needing 9×5 support |
| Enterprise | Quote | Custom | Compliance and priority-support needs |
Prices are from Portainer’s pricing page as of August 2026; Starter and Scale require an annual commitment.
So which should you pick? For a single VPS with one admin, Community Edition: it’s open source, needs no registration, and does everything in this guide, Git deploys included. If you want role-based access control (RBAC) for a second user, or you’re already running two or three boxes, take the Business 3-nodes-free tier instead — it’s the same software with the Business features unlocked, free for as long as you stay at three nodes or fewer. The paid plans only make sense when you’re managing real node counts across a team — and check the support line before assuming paid means supported: as of August 2026, Portainer’s pricing page lists community support on the Starter plan, 9×5 next-business-day support from the Scale plan up, and prioritized support on Enterprise.
Should You Add Portainer or Skip It?
Here’s the honest two-sentence answer:
✅ If you’re going to share this server, deploy from Git, or run more than three containers a year from now, install Portainer while the host is fresh and your habits are still forming around it.
❌ If you’re running one quiet app and you’re happy in the terminal, you won’t miss the UI you didn’t install.
The real question isn’t Portainer vs. no Portainer. It’s whether self-hosting is the right call for you at all — and you answered that when you opened this tab.
A 4 GB VPS, Docker, and Portainer CE are enough to start self-hosting for real: pick your apps, sum their documented requirements, and let the worksheet — not the wishlist — decide when the box needs to grow.
That’s not a bad deal.
Frequently Asked Questions About Docker and Portainer
Can you run Docker on a VPS?
Yes. A VPS with root access is one of the most flexible places to run Docker: you install Docker Engine on the server’s Linux OS, and each app runs in its own container. The distinction people trip on is that the VPS is the rented virtual server, while Docker is the software you run on it to isolate applications into containers. Any VPS with root access and enough RAM for your containers works — DreamHost VPS Hosting even offers a preinstalled Docker + Portainer image.
What is Portainer used for?
Portainer is used for managing Docker, Docker Swarm, and Kubernetes containers through a web interface. It runs as a Docker container itself, connects to the host’s Docker socket, and gives you a browser view and control surface over every other container on the host — starting and stopping containers, deploying multi-container stacks, viewing logs, and managing user access without SSH’ing in.
Do I need Portainer if I have Docker?
No, you don’t need Portainer to use Docker. Docker works completely from the terminal, and many self-hosters never install a UI on top.
Portainer earns its keep when you’re juggling more than two or three containers, sharing access with someone who doesn’t live in a terminal, or deploying stack updates from a Git repository. Skip it if you’re running one or two stable containers and you’re comfortable with Docker Compose.
What port does Portainer run on?
Portainer serves its web UI over HTTPS on port 9443 by default. The official install command in Portainer’s Linux install doc also publishes port 8000, a TCP tunnel used only by Edge Agents when you connect remote Docker hosts later — it’s optional, which is why the single-host install in this guide drops the -p 8000:8000 flag entirely.
How much RAM does Portainer need?
Portainer’s current system requirements don’t publish a RAM minimum — the Server runs as a lightweight container, and the docs’ stated performance guidance is about disk, not memory. Size your RAM by summing the documented requirements of the operating system, the Docker daemon, and every app you’ll run, then leave headroom for spikes.
At DreamHost, our entry-level VPS Hosting plan, Stack 4, comes with 4 GB of RAM — a starting point for a small stack of side-project containers like Ghost or n8n. Whether 4 GB is enough depends on the apps you actually run; if the math outgrows it, you can move up to a bigger Stack plan.
Is Portainer free?
Yes, twice over. Portainer Community Edition is free and open-source, with no license key required. Portainer Business Edition (which adds features like role-based access control) is also free for up to 3 nodes, with full features and no time limit; you register for a free license key instead of paying. Above three nodes, Business pricing starts at $105/mo on the Starter plan per Portainer’s pricing page (as of August 2026), and a $155/year Home & Student license covers non-commercial homelabs up to 15 nodes.
Can Portainer manage multiple Docker hosts?
Yes, Portainer manages multiple Docker hosts through Agents and Edge Agents. The standard Agent listens on port 9001 on each remote host; Edge Agents instead connect out to the Portainer Server’s tunnel port 8000, and per Portainer’s requirements docs they need no open inbound ports of their own. For a single-VPS self-hoster, none of that machinery is needed — which is why this guide’s install drops the port 8000 flag that Portainer’s official command includes. The day you connect a remote environment through an Edge Agent, redeploy Portainer with -p 8000:8000 added, then allow container port 8000 through UFW from each Edge Agent’s public egress IP, replacing EDGE_AGENT_IP here: sudo ufw route allow proto tcp from EDGE_AGENT_IP to any port 8000.
Does Docker bypass UFW on a VPS?
Yes, Docker bypasses UFW by default because Docker manages container traffic at the iptables NAT layer, which sits in front of UFW’s INPUT and OUTPUT chains.
Per Docker’s packet-filtering documentation, “packets are diverted before it reaches the INPUT and OUTPUT chains that ufw uses.” The fix is to add your rules to the DOCKER-USER iptables chain, and a community tool for wiring UFW into it is chaifeng/ufw-docker — installed before Portainer ever starts, in step 4 of this guide.

Own Your Entire Stack. Apps, AI, Databases, and More.
Keep every credential and conversation on a server you control, with NVMe speed and unmetered bandwidth built in.
Explore VPS Hosting Plans